
I have been having a play with the BerryClip and Scratch and had forgotten just how much fun Scratch is.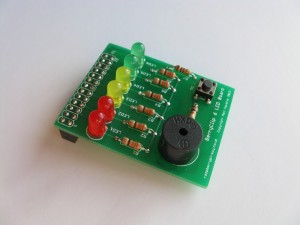
What is a BerryClip ? – this is about the simplest IO board for the Rpi around, it has 6 LEDs, a switch and a buzzer. Using the Berryclip Scratch is a great way to introduce basic control to young and old alike. http://www.raspberrypi-spy.co.uk/berryclip-6-led-add-on-board/
To get up an running you first need to build the Berryclip which comes as a simple kit. The only issue to consider is to check it will not clash with your Rpi’s enclosure. The second and last stage is to download a modified version of Scratch, which permits easy access to the GPIO and Berryclip.
(Berryclips are available from a number places including ‘modmypi.com’)
Installing modified Scratch – ‘ScratchGPIO’
[ these instructions assume you are logged in as the default user –pi, if not you should work from the link at the end of this post]
Open up an LX Terminal window and either type or copy the following instruction into the LX window, then run it. This will download the installer.
sudo wget http://goo.gl/dANpKr -O isgh.sh
Once the installer has been downloaded type (or copy and paste) the text below as before
sudo bash isgh.sh
This will install a modified version for Scratch. You should see an extra scratch icon on your desktop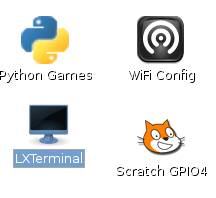
Using Berryclip with Scratch
[these assume you have already installed the ScratchGPIO]
To use it just set the AddOn variable to Berry and then you have easy methods of accessing it. To do this create a new variable ‘AddOn’ and set it to ‘Berry’, then place this at the start of your program.
Broadcasts available
[Led1..6] [On/Off/High/Low] e.g broadcast Led1On will make first red led light up
[All] [On/Off/High/Low] e.g broadcast AllOn will make all LEDs and the buzzer come on.
[Buzzer] ]On/Off/High/Low] e.g broadcast BuzzerOn
Variables
You can use variables instead e.g Set Led1 On will turn on 1st LED
And also use Power1..6 (values 0-100) variables to vary the brightness
[update – the variables are only sent on change, so you need to make sure your code works from start up include a set Led1..6 to 0 as part of the initialisation]
Sensor
There is only one sensor value returned and that is called switch (1 if not pressed – 0 if pressed).
[Taken from http://cymplecy.wordpress.com/2013/04/22/scratch-gpio-version-2-introduction-for-beginners/]
These instructions are based on material from the raspberrypi-spy and cymplecy blogs.
