Cat Cam mark 2

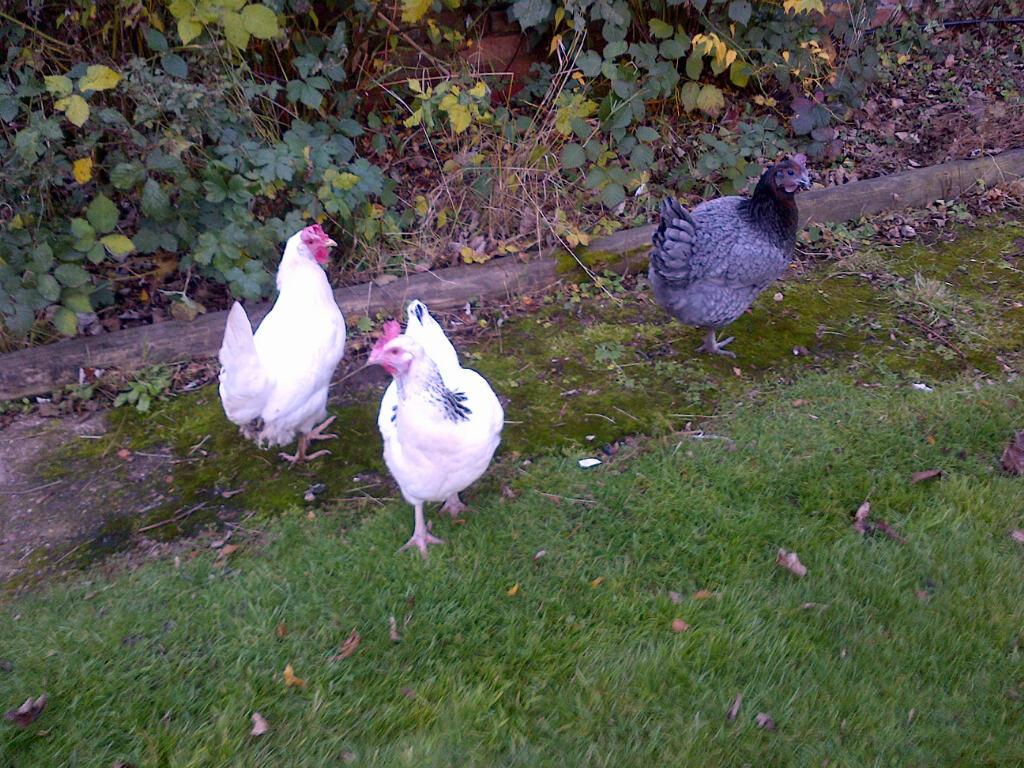
First testing of the new Raspberry Pi cat-cam today, the original goal was simply to allowcapture-20140405-085936
my wife to know when the cats had last been home after one disappeared for couple of days. This version now includes the capability to email a zip file me after every 16 or so pictures have been taken.

The project started life way back in the Rpi pioneering days of capture-20140405-085943
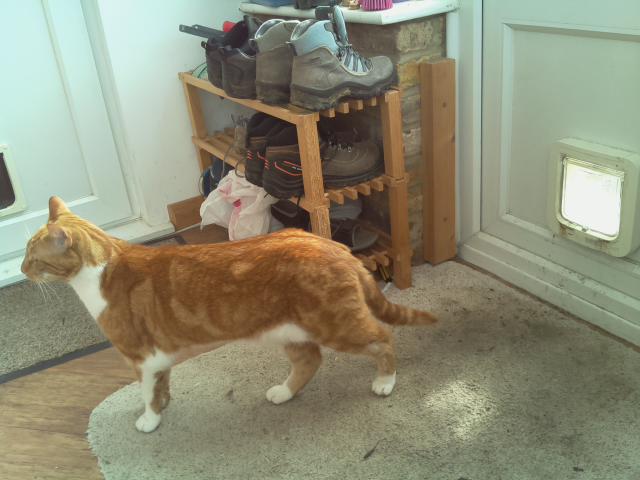
2012 using Motion and USB webcam, but I abandoned it after much frustration with unreliable wifi links and problems with the Motion application crashing randomly. So what has changed, well most importantly a decent power supply and I have found the trick to disable the power saving mode on Realtek wifi dongles [ see my Random pi notes for details ].

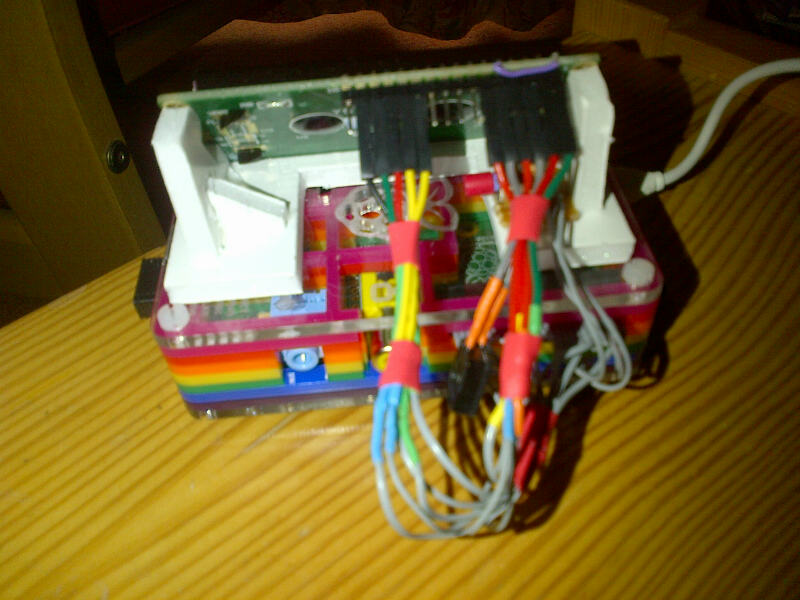
Having now also got hooked on Python I decided to drop Motion for the excellent light weight python motion detection ‘picam’ code originated by brainflakes, with some cat_pi_camimproves by pageauc, peewee2 and Kesthal. And as you can see from the picture I am using a Picam now rather than a USB webcam.

http://www.raspberrypi.org/forums/viewtopic.php?f=43&t=45235&start=25#p390983

Rather than adding the ziping and emailing code to the basic picam program I decided to write this as standalone application. This avoided the need use multitasking within a single python application -as I was concerned with how stable this would be.

The email application monitors the size of a folder containing the captured pictures from picam when this reaches about 1Mb it makes a temporary copy then zips and emails it to me using a Gmail account setup specifically for this job, again see my Random pi notes for a link on how to do this. Keeping this as a separate application also ensures that if it does break I will still have pictures on the SD card to go back to.

To avoid a load of emails as picam captures dusk and dawn I have amended the picam code to stop recording movement from 7pm to 6am – at some stage in the future I will add a light sensor to automate this.

Posted in Uncategorized | Tagged , | 1 Comment

DS18B20 – Digital Temperature Sensor

DS proto

The DS18B20 to quote the manufacture MAXIM  ‘provides 9-bit to 12-bit Celsius temperature measurements. It has an operating temperature range of -55°C to +125°C and is accurate to ±0.5°C over the range of -10°C to +85°C. In addition, the DS18B20 can derive power directly from the data line (“parasite power”), eliminating the need for an external power supply’ . [you will also see it listed in some places as a ‘Dallas’ part – Dallas Semiconductor was purchased by MAXIM in 2001].

The DS18B20 communicates over a 1-Wire bus, so needs just 3 connections to the Raspberry pi and a single 4.7k resistor. Maxim’s 1-Wire bus protocol also allows multiple devices to be connected on the same data-line with no additional components.mult_DS_Rpi

The only downside as far as the RaspberryPi is concerned is that the 1-Wire interface is only available on GPIO4.

There are loads other blogs with simple guides showing how to connect the DS18B20 to the RaspberryPi, so I will not repeat here, but have included a link to an easy to follow example on the RasPi Mart site.

http://raspimart.co.uk/raspberry-pi-ds18b20-temperature-sensing/#!prettyPhoto

This also includes example Python code and how to enable to the ‘w1-gpio’ and ‘w1-therm’ elements automatically at start-up. If you are doing anything odd on you RaspberryPi you might want to check the following forum post to see for more information on this.

http://www.raspberrypi.org/phpBB3/viewtopic.php?t=35508&p=300363#p299502

As configured using the ‘w1-therm’ setup the DS18B20 provides a temperature readout in 1000th of a degC, which I think is not bad at all for something that only costs around £1.50 each [or cheaper in quantity]. Remember however that while the on-screen display may be to a 1000th °C the devices accuracy is specified at ±0.5°C.

ds screen dump

You can see here the affect of me holding my finger on the sensor for a few seconds.

I certainly think for next winter I will be moving over to these to control our chicken water heater, as the current analogue system using lm35’s does suffer a bit from noise. Also as DS18B20-WP-0-250x250you can get a pre-wired water proof version of the sensor, I can put a sensor directly in the water.

Posted in Uncategorized | Tagged , , | Leave a comment

Prototype Virtual Model Railway Control Panel Working

Happy tonight as I have just successfully operated a turnout [point] on my model IMG-20140208-00401railway via a Raspberry Pi running VNC for the first time.

When I started to build the model railway my plan was to build a custom control panel to control the railway electronics. While I was fine designing the control panel the physical build put me off somewhat. Having avoided the issue for a few months, it occurred to me that I could use a Raspberry pi to provide a virtual control panel and avoid all the pain of wiring. After a bit of experimenting with the Python Pygame library I got the basic graphics working. The main ‘picture’ is exported from ‘AnyRail’ (which I used to design the layout originally), with some additional edits in Visio. I have tried to keep it simple just using Pygame to detect mouse clicks on the points and change their position accordingly. Next will be to add control of the track power and signals – together with cleaning up the code a little !

IMG-20140208-00399


The Picture here shows the RPi and board electronics. Yes I know the heat-sink for the 5v supply is a bit of overkill but I had it in stock and given this is the back of layout it will not be seen in practice.


Posted in Uncategorized | Tagged , | Leave a comment

Adding more IO to your RPi

i2cAs part of a plan to move from a dedicated panel to use a Rpi for controlling my model railway set, I have been experimenting with getting the I2C interface on a RPi working using a MCP23017 chip.

In simple terms I could see that I was going to need more digital inputs and outputs at some stage so it made sense to add them now. I have to say it was all really very straight forward.

The picture on the right is the completed add-on board with a MCP23017, the smaller chipIMG-20140119-00387 is a 74HC244. This buffers the 8 basic GPIO pins, to drive an existing multiplex controller on the railway set. The 74HC244 runs from the 5volt rail giving me a full 5V drive output which helps get over the voltage drop between the Rpi and multiplex controller (it also protects the Rpi if something gets accidentally shorted out).

Have a look at my Random Pi notes page for some basic instructions to get the I2C port working on a Raspberry Pi.

Posted in Uncategorized | Tagged , | Leave a comment

RaspberryPi RSS News Reader

With my wife being a confirmed news junkie the Dec MagPi Scrolling RSS feed project by Andrew Wilson’s gave me the inspiration for the perfect Raspberry Pi based gift for Christmas 2013.

Chiltern-20131226-00375I decided to go for the ‘raw’ open look simply mounting a LCD display on top of a Rainbow PIBOW case, this was driven in part by an inability to find a suitable box with a pre-cut  opening for a 2 line 16 character display, but also I thought is looked good. The starting point for the software was obviously the article in the December MagPi, however in testing I found that periodically the display would corrupt. Looking at the imported ‘AndyPi_LCD’ code my feeling was that this was being caused when the ‘thread’  timed out mid way through sending a 2 byte command to the display. To get around this I created a modified version of ‘lcd. scroll_clock’ which returned after a number of loops to allow the RSS feed to be updated. I also tinkered with one or two other bits to improve the look and added to scan of a spare GPIO line so it was easy to initiate a controlled shut down.Chiltern-20131226-00376

Chiltern-20131226-00377Rather than stick with the single top-level RSS feed as described in the article I capture 4 of the 2nd level  BBC RSS news feeds that fit with my wife’s interests. As set-up it checks for updates about every 5 minutes. To make things a little more bullet proof I use the python ‘try’ statement in initiate updates allowing any RSS fetch failures to be managed and recovered from.

At power up the application auto-runs initially displaying the IP address of the RPi  for few seconds  (just in case I ‘lose’ it on the home network), it then starts the scrolling the RSS feeds and displaying the clock. The net result is simple but effective and provides a great talking point.  Chiltern-20131226-00374

For anyone interested , if you want a copy of the Python code drop me an email  – the code is not beautiful but it works.

Posted in Uncategorized | Tagged , , | Leave a comment

BerryClip and Scratch on the RaspberryPi

I have been having a play with the BerryClip and Scratch and had forgotten just how much fun Scratch is.berryclip_2013_03_12-300x225

What is a BerryClip ? – this is about the simplest IO board for the Rpi around,  it has 6 LEDs, a switch and a buzzer.  Using the Berryclip Scratch is a great way to introduce basic control to young and old alike. http://www.raspberrypi-spy.co.uk/berryclip-6-led-add-on-board/

To get up an running you first need to build the Berryclip which comes as a simple kit. The only issue to consider is to check it will not clash with your Rpi’s enclosure. The second and last stage is to download a modified version of Scratch, which permits easy access to the GPIO and Berryclip.

(Berryclips are available from a number places including ‘modmypi.com’)

Installing modified Scratch – ‘ScratchGPIO’

[ these instructions assume you are logged in as the default user –pi, if not you should work from the link at the end of this post]

Open up an LX Terminal window and either type or copy the following instruction into the LX window, then run it. This will download the installer.

sudo wget http://goo.gl/dANpKr -O isgh.sh

Once the installer has been downloaded type (or copy and paste) the text below as before

sudo bash isgh.sh

This will install a modified version for Scratch. You should see an extra scratch icon on your desktopscratchGPIO1

Using Berryclip with Scratch

[these assume you have already installed the ScratchGPIO]

To use it just set the AddOn variable to Berry and then you have easy methods of accessing it. To do this create a new variable ‘AddOn’ and set it to ‘Berry’, then place this at the start of your program.addion

Broadcasts available

[Led1..6] [On/Off/High/Low] e.g broadcast Led1On will make first red led light up

[All] [On/Off/High/Low] e.g broadcast AllOn will make all LEDs and the buzzer come on.

[Buzzer] ]On/Off/High/Low] e.g broadcast BuzzerOn

Variables
You can use variables instead e.g Set Led1 On will turn on 1st LED
And also use Power1..6 (values 0-100) variables to vary the brightness
[update – the variables are only sent on change, so you need to make sure your code works from start up include a set Led1..6 to 0 as part of the initialisation]

Sensor
There is only one sensor value returned and that is called switch (1 if not pressed – 0 if pressed).

[Taken from http://cymplecy.wordpress.com/2013/04/22/scratch-gpio-version-2-introduction-for-beginners/]

These instructions are based on material from the raspberrypi-spy and cymplecy blogs.

Posted in Uncategorized | Tagged , , | Leave a comment

Tweeting from my RaspberryPi

Found James Bruce’s article on setting up a Raspberry Pi to Tweet yesterday. Great fun but more importantly from the chickens perspective I can now tweet the heater status and [if I can waterproof my pi cam] pictures of feathered friends as well.

Took a bit of playing around but ‘raspistill -o image.jpg -w 640 -h 480 -q 25’ creates images small enough that Twitter will accept them.

Link to James’s article – http://www.makeuseof.com/tag/how-to-build-a-raspberry-pi-twitter-bot/

Posted in Uncategorized | Tagged , | Leave a comment

Rpi Controlled Chicken Water Heater Passes First Test

Chiltern-20131201-00346With the temperatures dropping below Freezing last night my Rpi controlled chicken water heater was called into action for the first time, passing with flying colours.

I have started to write-out some basic instructions on how it all works on a dedicated page of Chiltern-20131201-00347Meandering Pi Blog site for anyone interested.

Posted in Uncategorized | Tagged , | Leave a comment

First Post

The aim of this blog is so I can share the things I have been doing with my Raspberry Pi’s. In truth I have blown a little hot and cold on the Rpi since it came out, my initial enthusiasm being tainted by some limitations of the early software releases and problems getting a good power supply.

Although lots have changed and improved, particularly with the ‘NOOBS’ builds, it looks like most of my problems of late have been down to the ‘power saving feature’ of Realtek chip in my wifi dongle – turning this off produced a dramatic improvement in wifi stability for SSH sessions, check the following like if you have having similar problems.
http://www.raspberrypi.org/phpBB3/viewtopic.php?f=28&t=47142&hilit=%2Fetc+wifi+module+sudo+nano&sid=c65422501fafbb88ceada3d8e18ad4cd

At about the same time my wife suggested that I should use a Raspberry to control the water heater for her chickens and an idea was born….

Posted in Uncategorized | Leave a comment